神乎其技的....snippet
¶神乎其技的…snippet
原文連結: https://darkblack01.blogspot.com/2013/12/snippet.html
移植時的最後更新日期: 2013-12-25T11:27:04.696+08:00
sublime text 2 有提供一種叫snippet的功能。
簡單的說就是它幫你生成程式碼,你type進一些關鍵字,他creat出整個程式架構。
也可以說是半自動產生程式的工具。
(這不就是寫程式幫你寫程式的一開始嗎?)
來說說這是怎麼設定的吧!^^
第一步,先在sublime text 2 -> Tool -> New Snippet,出現了一個檔案
<snippet>
 <content><![CDATA[
Hello, ${1:this} is a ${2:snippet}.
]]></content>
 <!-- Optional: Set a tabTrigger to define how to trigger the snippet -->
 <!-- <tabTrigger>hello</tabTrigger> -->
 <!-- Optional: Set a scope to limit where the snippet will trigger -->
 <!-- <scope>source.python</scope> -->
</snippet>
這段程式碼,分成三個部份
<content><![CDATA[
Hello, ${1:this} is a {2:snippet}.
]]></content> 和註解中的<tabTrigger>hello</tabTrigger><scope>source.python</scope>
第一個部份
定義最後生成的code第二個部份
定義要打的關鍵字第三個部份
定義此code是屬於什麼語法來試試看
<snippet>
 <content><![CDATA[
#ifndef NAME_H
#define NAME_H

class name
{
public:
 name(para);
protected:
 virtual ~name();
private:
 /* data */
};
#endif
]]></content>
 <!-- Optional: Set a tabTrigger to define how to trigger the snippet -->
 <tabTrigger>aaaaa</tabTrigger>
 <!-- Optional: Set a scope to limit where the snippet will trigger -->
 <scope>source.c++</scope>
</snippet>
改好了之後
存檔成*.sublime-snippet
存檔名稱,會成為這個部份路徑...我是用預設啦!
不必重新開啟sublime text2
直接試試看
另外,設定變數的部份
sublime text2提供了在程式碼生成時,可以再設定這個程式架構的各個變數,因為畢竟整個架構中,也許誰和誰的名稱要相同。變數
例如:{1:name}1: (:前的數字) 設定順序(用tab鍵切換)
:name (:後的文字) 設定預設名稱
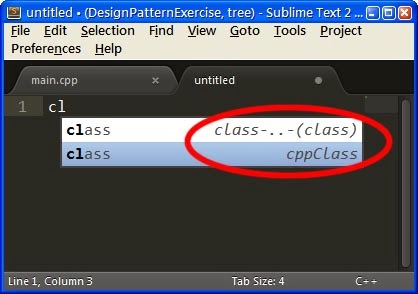
最後,我做出了一個,在設計class時,就會自動加上條件編譯的#ifndef-#endif的snippet
<snippet>
<content><![CDATA[
#ifndef ${1:NAME_H}
#define ${1:NAME_H}
class ${2:name}
{
public:
{3:para});
protected:
{2:name}();
private:
${5:/* data */}
};
#endif
]]></content>
<!-- Optional: Set a tabTrigger to define how to trigger the snippet -->
<tabTrigger>class</tabTrigger>
<!-- Optional: Set a scope to limit where the snippet will trigger -->
<scope>source.c++</scope>
</snippet>
發表於
tags:
{ sublime text2 }
