Jest for Vue with Vuex 演練
¶Jest for Vue with Vuex 演練
這次測試,要測試的是模仿使用者操作。
在畫面顯示的變化要出現
這次的練習,是由 Testing Vuex in components - Vue Test Utils 這一篇的程式碼修改而來。
使用單元測試的框架與測試方式,拿來來測試類似 E2E 的使用者案例,還可以保持單元測試的速度 (一定要在5分鐘跑完全部)。
優點
- 案例可以快速建置,快速測試。
- 測試程式碼可以呈現頁面的使用案例,方便回歸測試。
缺點
- 若程式碼修改,案例也許會需要經常修改。
也許,我只是說也許啦!
這算是 BDD 想說的「行為測試」
小心使用
¶官網文件,不好上手
其實 vue 的文件寫得很爛。(逃~)
怎麼說呢?文件裡大部份的使用情境都是給 cdn 使用的。初學者要看著文件學習,一定會充滿挫折感,畢竟除了學功能之外,看完文件竟然還無法處理大型專案,那學框架歷程就不這麼有成就感。
最後要搭配教學影片,才有辦法進入 vue-cli 的使用方式,了解大型專案處理上,另外要學習的重點。
所以,文件的使用情境,是初學者無法一眼看明白的挫折,怎麼弄程式碼就是跑不起來,原來是搞錯了文件的情境。
Vue 官網的 Unit test 的情用情況是 vue-cli[1]
有 vue-loader 將 *.vue 檔吃進來,所以程式碼才會看見 <template>, script 放在同一個檔案。
Vue Test Utils 官網
Vue Test Utils 一開始是要你下載一個什麼情境都不是 (甚至不跑 vue) 的 repo ,並且跑 vue 的測試。
在此,是給你一個 node.js 的 repo 做練習。
當然這並不是跑不起來,但是一開始入手時,總是要有一個待測專案,要嘛是 vue+cdn 要嘛是 vue-cli 的專案。
¶練習專案建置方式
跟著我就可以比較順利的來玩玩看。
安裝 Jest[2]
npm install --save-dev jest安裝 Vue Test Utils [3]
npm install --save-dev @vue/test-utils呃…這篇是 for 初學,如果自己裝要自己設定 config ,我們還是重來一次
¶再重來一次
安裝 vue-cli (vue-cli 3)[4] + 執行專案初始化[5]
npm install -g @vue/cli-service-global
vue create vue-unit-test-demo
cd create vue-unit-test-demo
選項請使用手動選擇 (不要用預設選項)
並且選擇
- 要測試
- 用 Jest
- 要 Vuex
- 要 Vue-Router
其它隨意。
¶寫 code
進入官網 Unit Test[6] 的介紹頁面 在 Mocking Actions 這一段程式碼 就可以用在這個時候。
¶建立頁面
建立一個 Action.vue 的檔案。將程式碼貼上去。
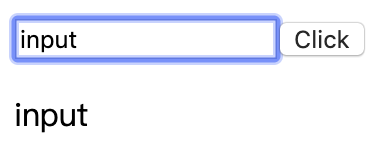
並且加一行在 <button> 下面,把成功放進 vuex 的字串顯示出來
<template>
  <div class="text-align-center">
    <input type="text" @input="actionInputIfTrue" />
    <button @click="actionClick()">Click</button>
    <p>{{$store.getters.text}}</p>
  </div>
</template>
檔案放置的參考
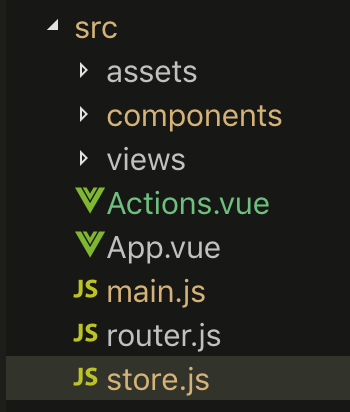
修改 main.js
import Vue from "vue";
import Action from "./Actions.vue";
import router from "./router";
import store from "./store";

Vue.config.productionTip = false;

new Vue({
  router,
  store,
  render: h => h(Action)
}).$mount("#app");¶補完 Vuex
為了可以讓它正常運作,我們要補完 Vuex 的程式碼
import Vue from "vue";
import Vuex from "vuex";

Vue.use(Vuex);

export default new Vuex.Store({
  state: {
    text: "Hi, You can input text, exchange me."
  },
  mutations: {
    input(state, inputValue) {
      state.text = inputValue
    }
  },
  actions: {
    actionClick({commit}) {
      commit('input', "input!!")
    },
    actionInput({commit}, {inputValue}) {
      commit('input', inputValue)
    }
  },
  getters: {
    text(state) {
      return state.text
    }
  }
});¶呈現畫面
¶寫 Testing
一樣在進入官網 Unit Test[6:1] 的介紹頁面 在 Mocking Actions 第二段程式碼,就是它的測試程式。
¶建立測試檔案
新增一個 actions.spec.js 檔案,將其它的檔案改成 *.test.js (目前的設定只會執行 *.spec.js),並且把內容貼上來。
¶加入測試 Vuex 的部份 (原本的測試程式,不測試 Vuex)
因為原本的教學,是為了測試 Component 必須要 Mock 掉 Vuex 的 Actions。但是,在此我們要把它真實的樣貌放進來。
並且測試其中一部份。
移除初始化 Vuex 的部份,並且將真實的 Vuex 引進來,放進 shallowMount(Actions, { store, localVue }) 中參與測試,再調整一下程式碼,測式程式的初始化,變成下面這一段
import { shallowMount, createLocalVue } from '@vue/test-utils'
import store from '@/store'
import Actions from '@/Actions.vue'

describe('Actions.vue', () => {
  const localVue = createLocalVue()
  const wrapper = shallowMount(Actions, { store, localVue })

  it(/* ... */)
})
在此先註解掉所有測試,並且加上這個測試,跑看看是不是初始化有沒有出錯。
it('for test', () => {
    expect(1).toBe(1)
})¶如果有出錯
是出自於引入 import 語法的問題,那應該是 jest 須要引入 babel 。不過應該有安裝 babel-jest 的套件了才對
修改 jest.config.js
將執行 babel-jest 的,加上 .js 的副檔名。
module.exports = {
  //...
  transform: {
    //...
    "^.+\\.(js|jsx)?$": "babel-jest",
  },
//...¶修改原本的測試內容
如果沒有出錯,或排除錯誤的話,就繼續。
¶加入測試初始化完成狀態
一開始 components 執行到 mounted 時,會顯示 vuex 的內容,來測試一下是不是真的會這樣
it('shwo Hi, You can input text, exchange me.', () => {
    const p = wrapper.find('p')
    expect(store.getters.text).toBe('Hi, You can input text, exchange me.')
})¶測試使用者輸入文字
在原本的這個測試,只測試它是不是會執行 Actions 在此,直接測試畫面是否會顯示出我們輸入的 “input”
而不管是不是執行了 actions 所以不需要 mock 這個 function 反而要抓到畫面顯示的 <p> 並且看它的內容是不是預期的 “input”
it('dispatches "actionInput" when input event value is "input"', () => {
    const input = wrapper.find('input')
    input.element.value = 'input'
    input.trigger('input')
    // expect(actions.actionInput).toHaveBeenCalled()
    const p = wrapper.find('p')

    expect(p.text()).toBe('input')
    expect(store.getters.text).toBe('input')
})¶測試使用者按下 button
當使用者按下之後,會將 vuex 的 state.text 設定成 “input!!”
特別要說的地方,除了可以把 <p> 的內容抓出來檢查之外
也可以從 vuex 的 getters 也可以檢查是不是從哪個 getters 抓到的
it('calls store action "actionClick" when button is clicked', () => {
    wrapper.find('button').trigger('click')

    const p = wrapper.find('p')

    expect(p.text()).toBe('input!!')
    expect(store.getters.text).toBe('input!!')
})
這樣一來就可以好好的測試一下使用者案例了。
下次再來寫怎麼測送出 API (用 axios )